We have just launched the next big thing on azing: the task system. Now any checklist can become a task, remembering what you already did - and can be forwarded to your co-workers. Discover it now 😊!
azing Task System
The new task system is streamlined into the way people work, and similar to many other task-management systems, so you should feel comfortable right away.
Introducing the Task System
The task system offers hundreds of features to organize yourself and your team (if you are part of a team). You can use it as a plain task system with simple titles/notes, but it really shines when you start combining it with checklists from the azing catalog.
Before we explain everything you can do, let's name the parts of the system so you know which section we're explaining:
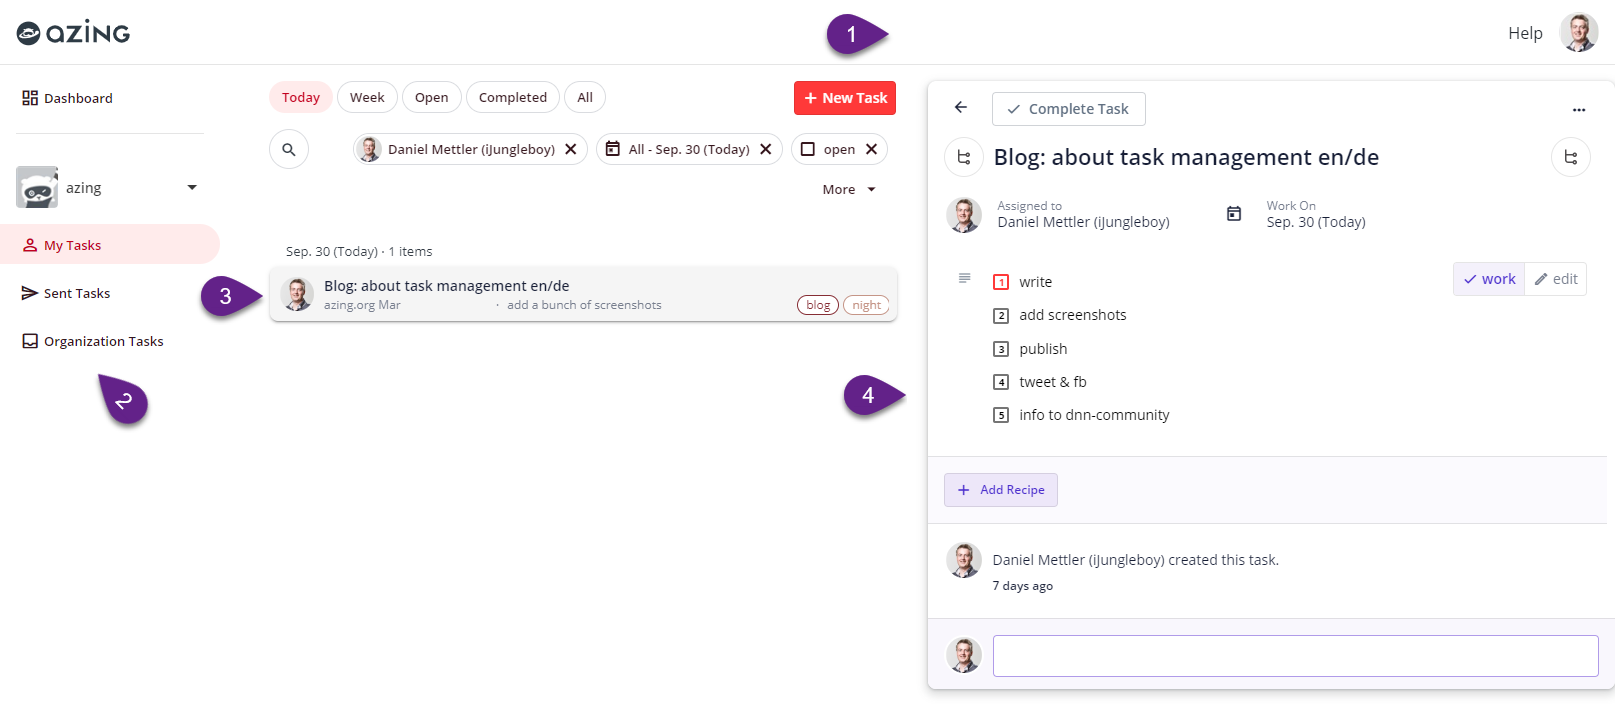
In this picture, you see:
- header bar containing the logo, access to help and your personal menu
- navigation to see your dashboard, switch teams and to see your tasks as well as tasks you sent to others (and in future, you'll also see folders and more here)
- task list showing the tasks of today (or any other combinations of filters)
- task showing the task you're currently working on
Create Tasks
Tasks can be created in 3 ways: by hitting NEW TASK, by creating a task from a checklist or by creating a child task from an existing task.
#1 Quickly Create a New Task (Alt+n)

When creating new tasks, a small dialog appears letting you add a name. When you hit enter, the task is created and the dialog remains open so you can create more tasks. Note that if a task is already open at this time, that task will remain open, so you can just add more tasks quickly without actually stopping what you were working on.
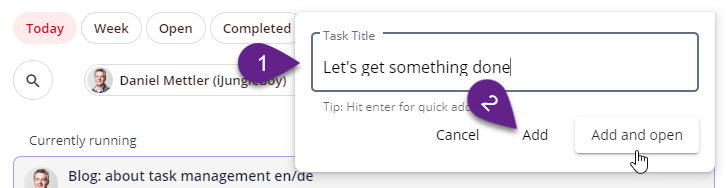
If on the other hand you actually want to open the task you're just creating, to add more notes or set a date, just press the third button instead.
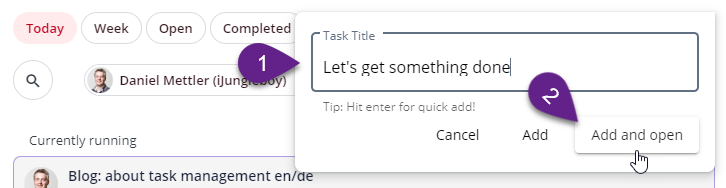
You can quickly enter this dialog by hitting Alt+n.
#2 Create a Task from a Checklist
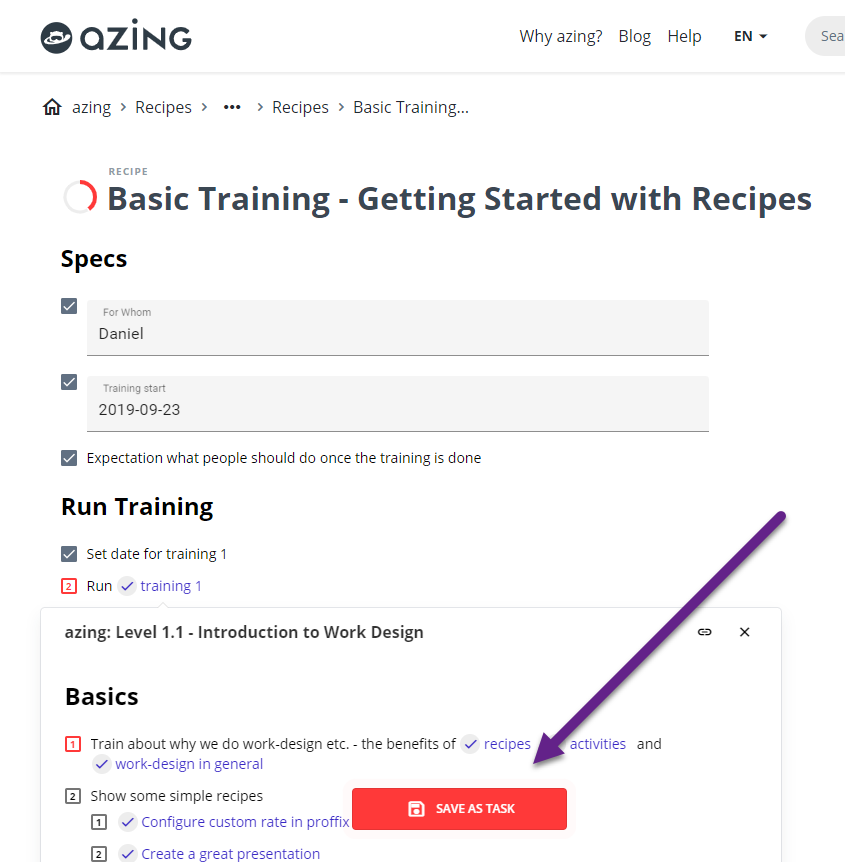
The easiest way is to find the checklist you want in the catalog, set a few checkboxes and hit SAVE AS TASK (see image to the right).
Just...
- start with any checklist in the catalog - for example, you could try the Basic Training checklist
- set a few checkboxes
- hit SAVE AS TASK
- continue setting checkboxes - your state is always saved
This is just the main way to do it. You can also start with a task and attach a checklist later on when you realize what is needed. More on that later on.
Some notes about this:
- If you are not logged in, the system will ask you to log in or create an account first. No data is lost, so the checkboxes you set remain stored.
- If you are a member of the team that made the checklist (like if it's a corporate checklist), the task will also be stored in that team. Otherwise it will save it in your private tasks.
Once you created thet task, you can continue to the task with the OPEN TASK button...

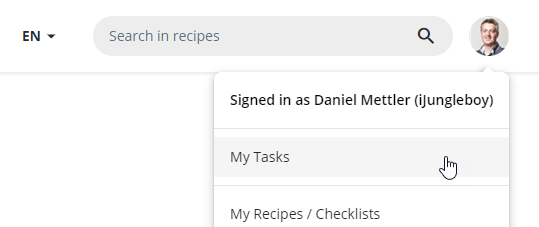
...or access it through your user menu.
#3 Create a Child Task
This will be explained further down where we explain Task-Context and various ways to see parent and child tasks.
Task Views
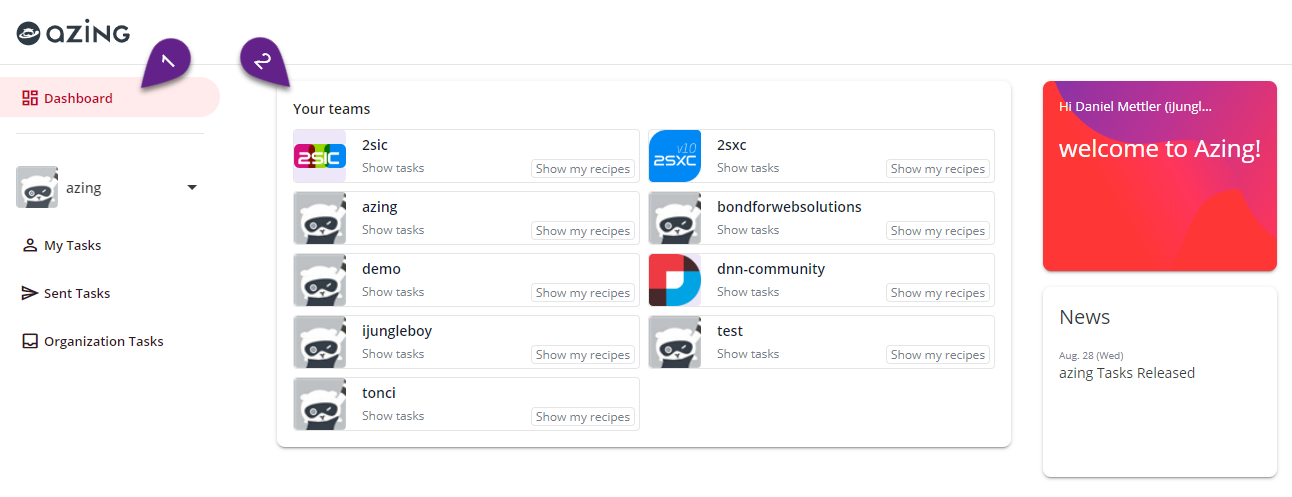
Dashboard
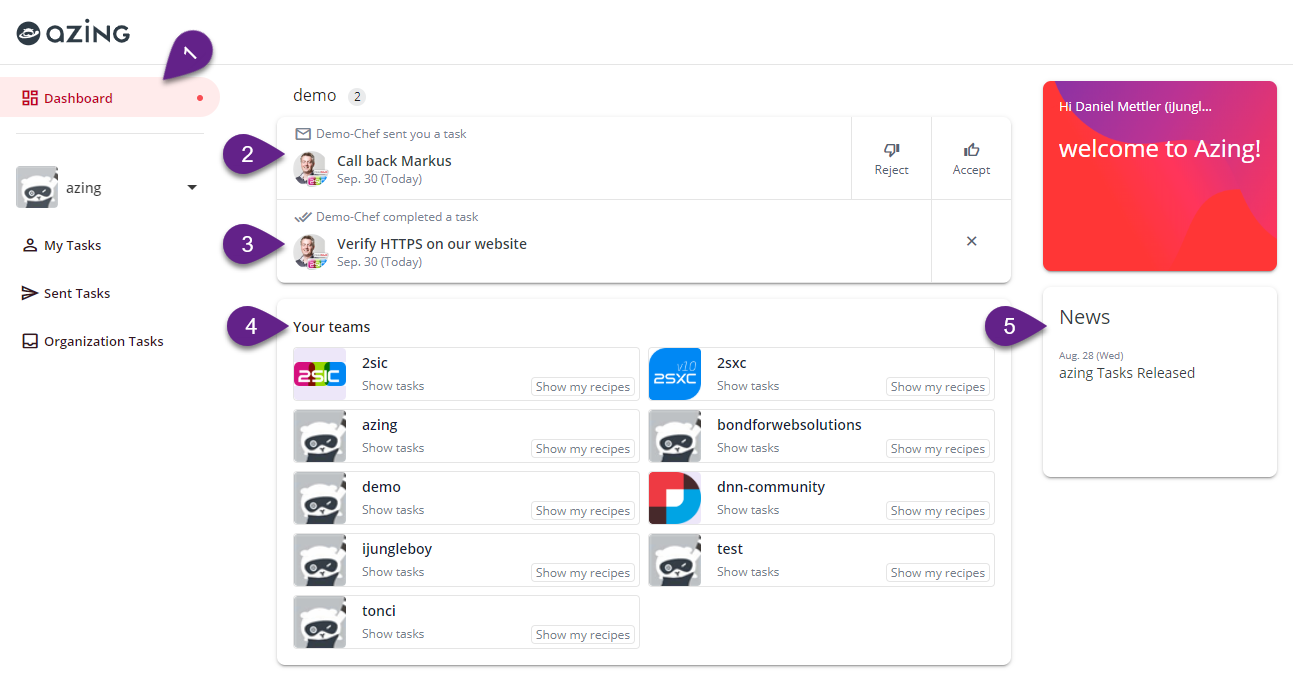
The dashboard shows you
- the button to access the dashboard
- inbound tasks sent to you which you can accept or reject
- notifications of completed tasks FYI
- links for the teams you're in, both to the tasks as well as to checklists
- system notifications and news
My Tasks
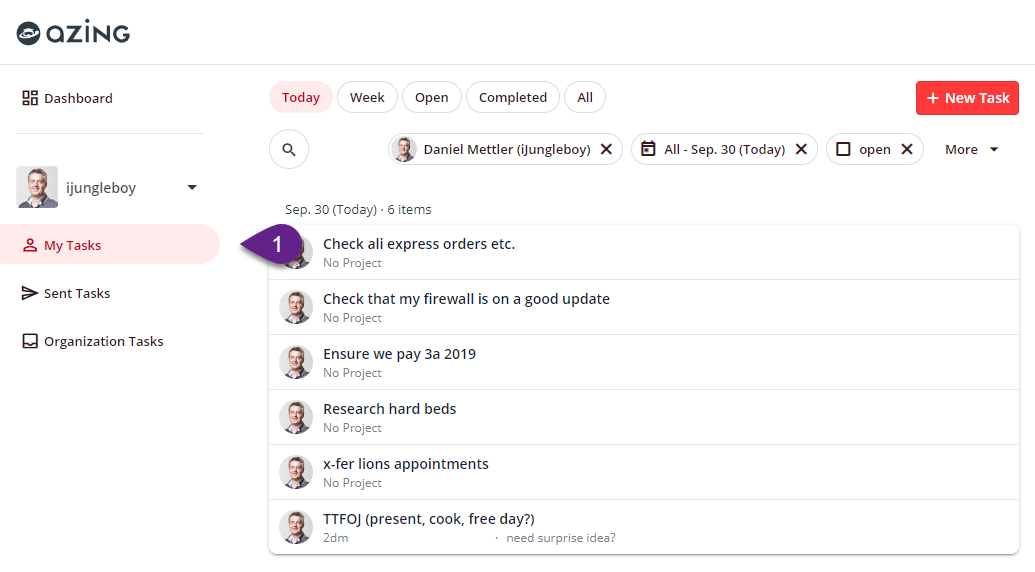
My-tasks lists your tasks, sorted by the date you planned to work on. Various views show you things you should focus on, like Today, This Week, etc. You can also apply additional filters like tags and more. See also below Features of all Task Lists
My Sent Tasks (Enterprise Feature)
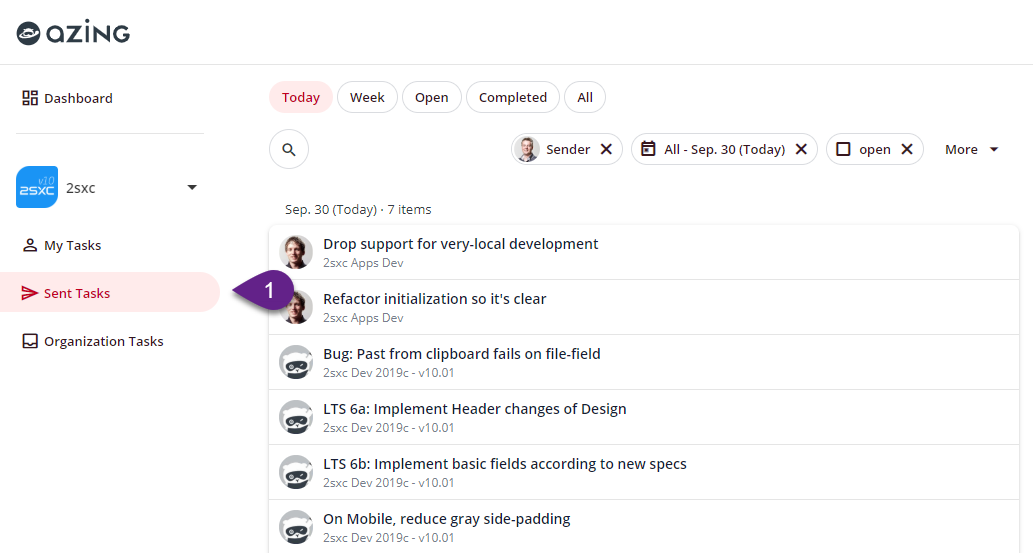
When you delegate tasks to others, they are removed from your tasks and appear in the inbox of the recipient. My delegated tasks shows you all the tasks you have sent to others.
Organization Tasks (Enterprise Feature)
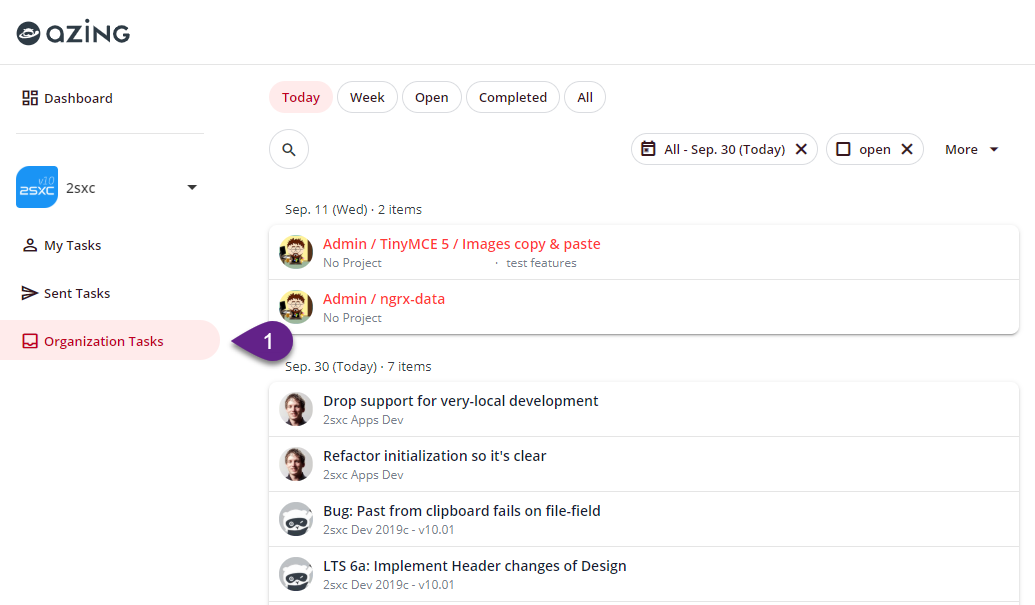
If you are a task-admin, this lets you see all the tasks of your entire team so you can manage/prioritize what should be done when. Remember that because of this, task-admins have full insight into the tasks of their team, and could also see confidential information.
Features of all Task Lists
All task lists show the tasks, sorted by the date you planned to work on. Various views show you things you should focus on, like Today, This Week, etc. You can also apply additional filters like tags and more.
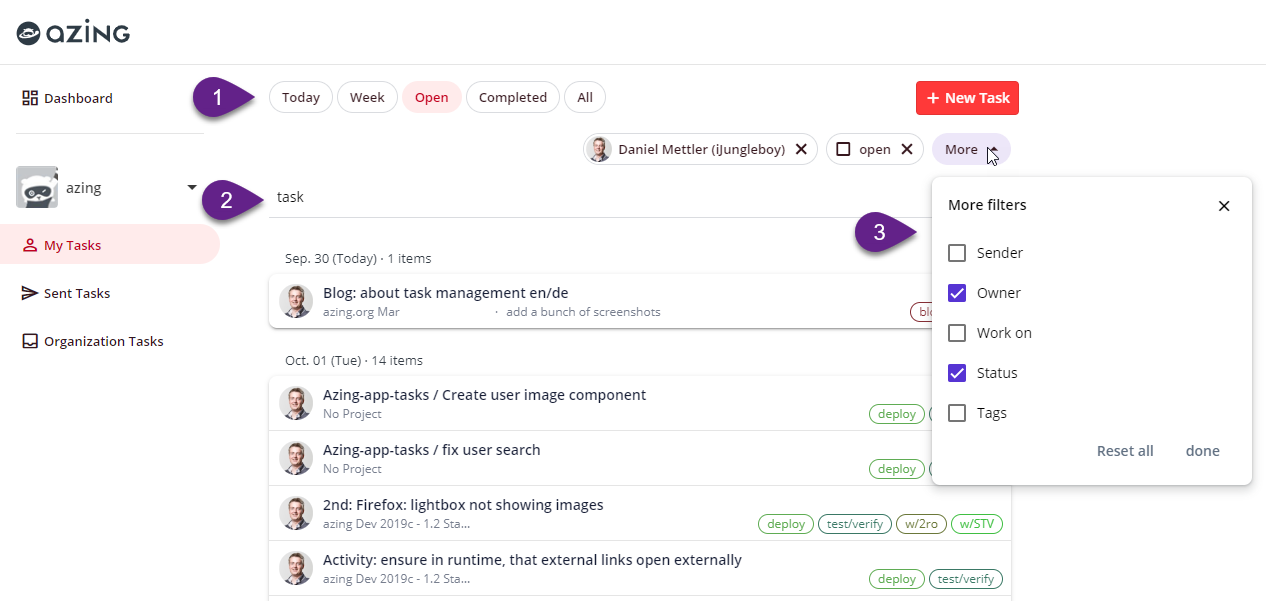
Note that all these lists are sorted with the overdue as well as upcomming tasks on top, and future tasks further down. The only exception is completed tasks, where you usually want to see things just completed first.
Views can be filtered by Personal Tags, Current Owner, Dates and more. You can also use a full-text search to find what you were working on.
Multi-Team Task-System
The system is Multi-Team capable, so you have your private tasks and tasks by organizations you work for. Each team is isolated from other teams, so tasks belonging to a team can only be seen by yourself, people who sent you the task, and task admins of that team.
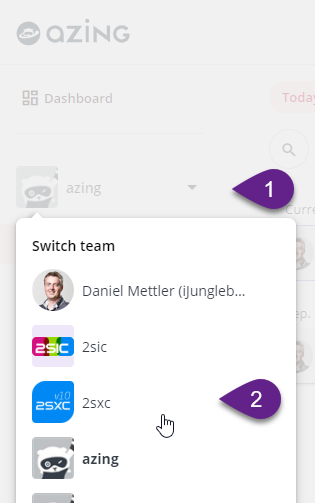
Switching To Another Team
To switch between teams, you can use the UI in the Dashboard...
...or you can use the dropdown in the side-bar:
Task Features
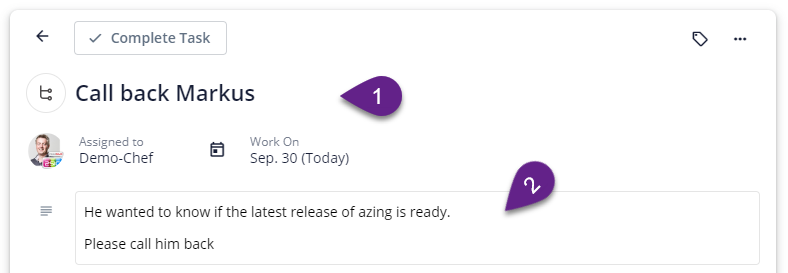
Task Basics
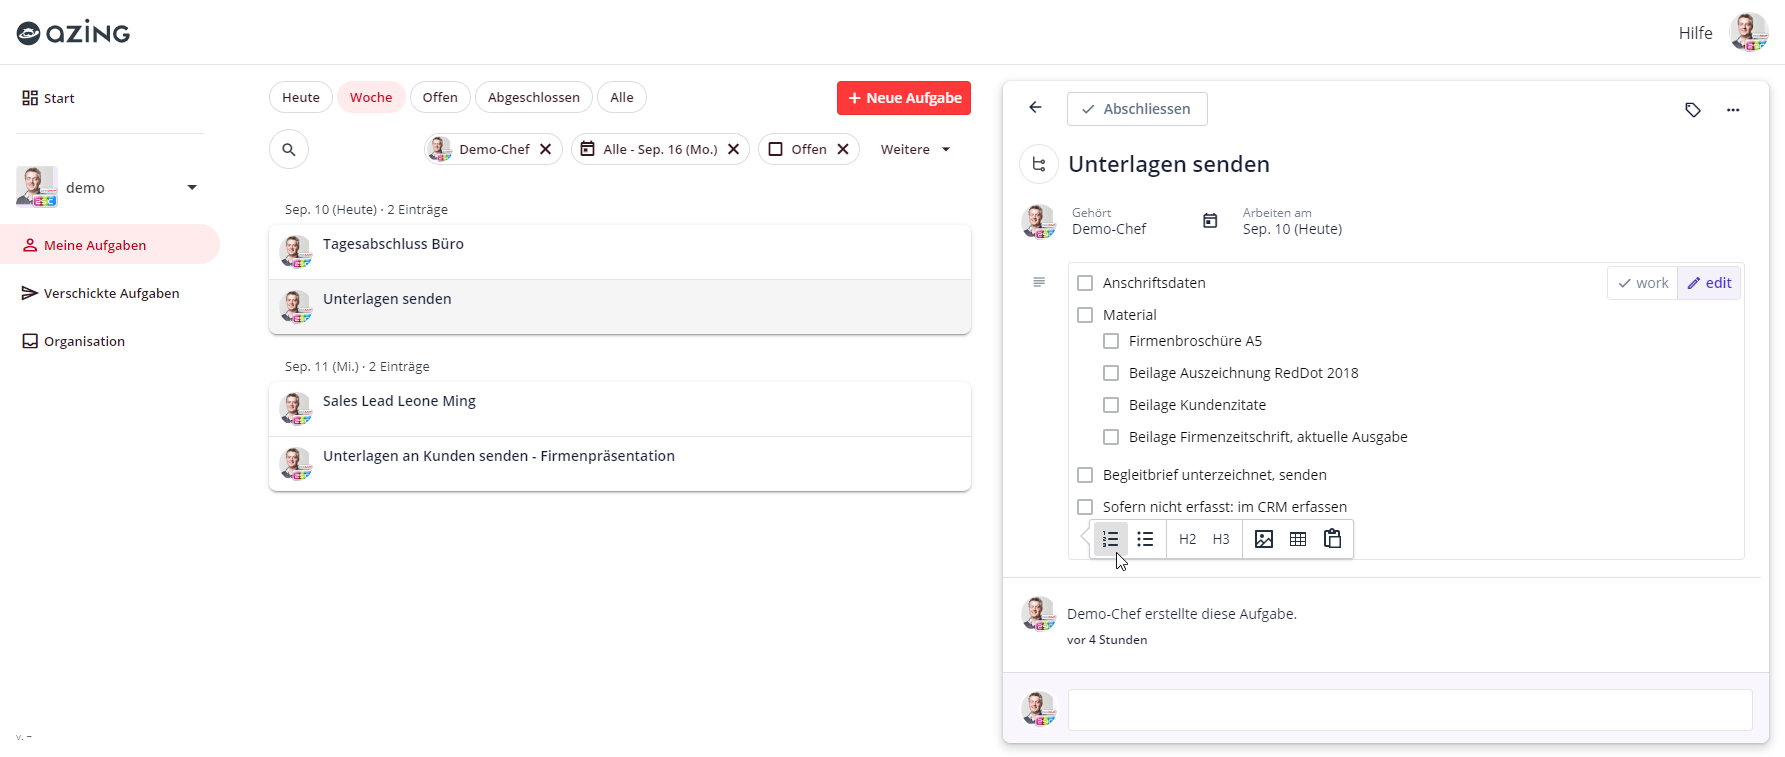
Every task has basic features like title and notes:
The notes are very special: when you create a numbered or bulleted list...
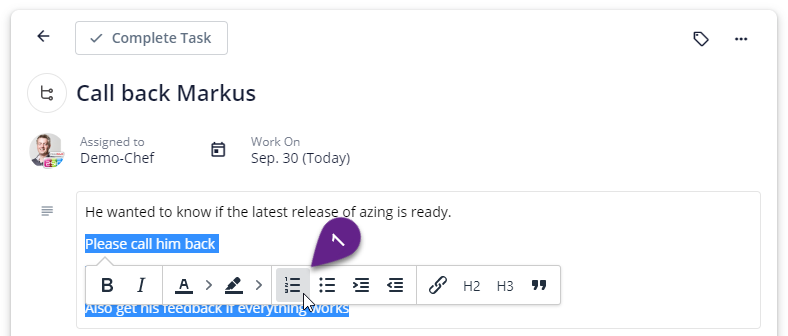
...it will automatically become a checklist.

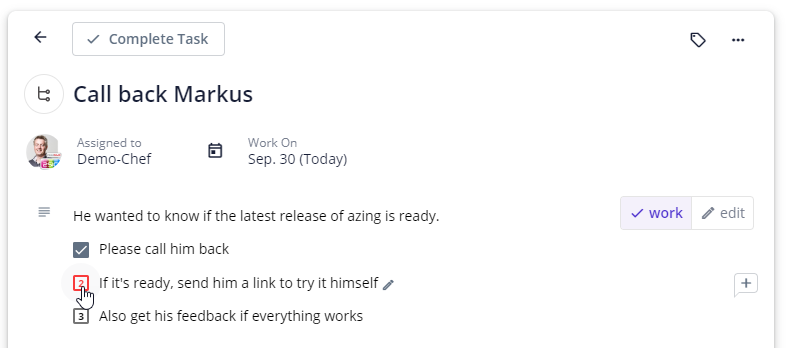
To switch from edit to work mode, a button appears when you type things that can be worked on (note that it won't be there, if you only typed a bit of text which wouldn't be interactive):
Dates and Prioritizing (Alt+...)
Tasks have a work-on date (when you want to resume work, or need to pick it up to decide what should be done). This is the primary date for almost everything, and tasks will appear on your list on that date. In addition, you can also set a due-date, so you can better prioritize your work. Overdue dates will show be red.
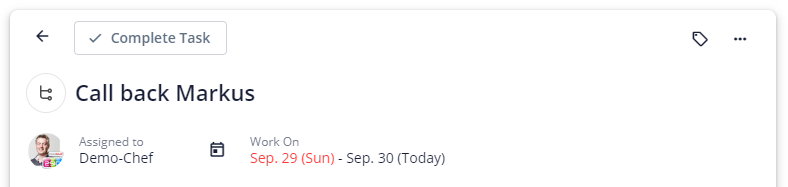
A task will typically have a work-on date, which is when you wil lactually work on it. Due-dates are optional, because it's important that tasks with a due-date are better visible and don't compete with less important tasks in your list.
Note that various keyboard combinations help you quickly move the task to another date, like Alt+1 will move it to tomorrow. You can see the list of keyboard shortcuts appear when a task is open and you press and hold the Alt key.
Delegate / Send Tasks to Other Team Members
 You are the owner of your tasks. When you wish to forward a task to someone else, just click on the owner and choose a new person who should continue the work on this task.
Note that you only see your team members in this list. Your team is defined in the user management of the catalog (in the profile section). So if you are missing someone to delegate tasks to, add them there. Also note that a task will offer different people to send it to, depending on the team the current task belongs to.
Tasks with Checklists
Tasks become totally awesome when you have checklists attached. You can do this from the task directly (search and pick) or when you are browsing a catalog of checklists and you convert a checklist into a task.
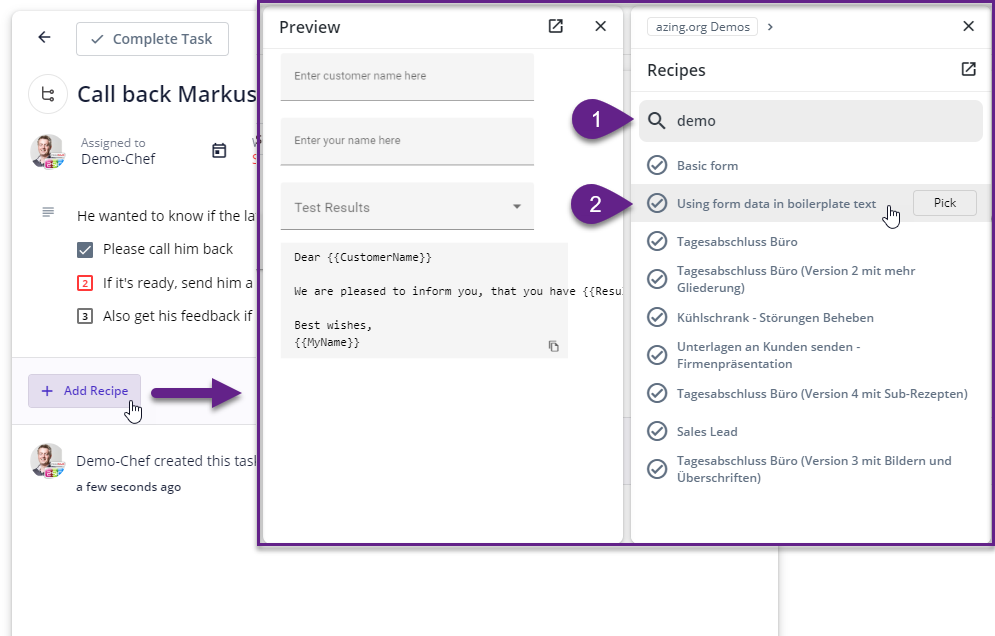
The picture above shows how to add a checklist to an existing task. To create a new task from a checklist in the catalog, see the instructions at the beginning of this blog.
Context: Parent and Child Tasks
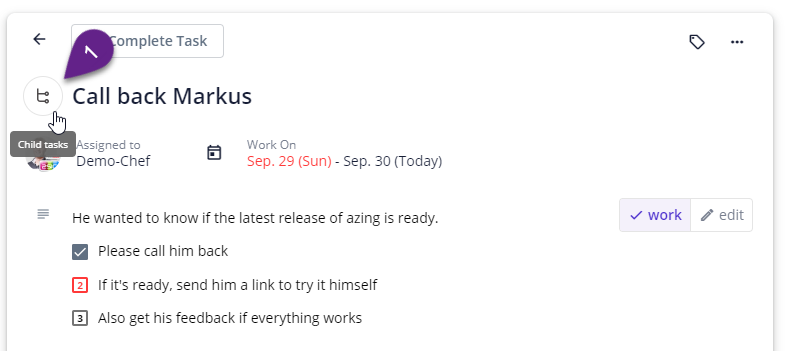
Often you may want to create sub-tasks from a large task. This can happen in various ways - either because you explicitly create a child task, or because you detach a checklist into an own task. These child tasks can also be delegated to other people.
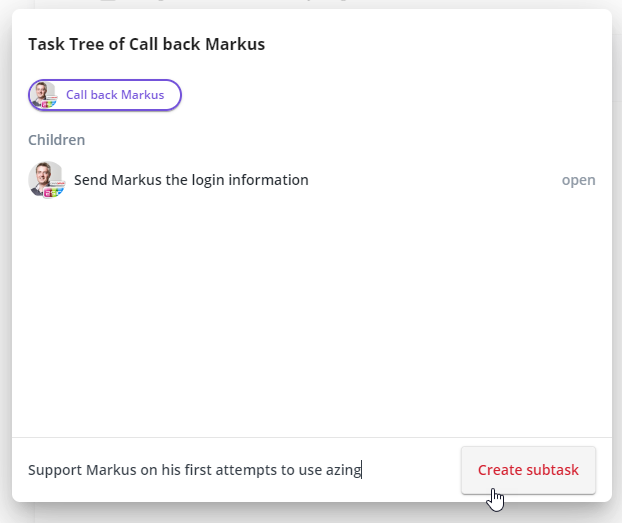
Manually Create a Child Task
This is for child-tasks which you just want to create on-the-fly. Press the Context button beside the title to enter the Context dialog. Here you can see and open parent tasks, child tasks and other context information. From here you can also create new child tasks.
Journal of a Task (Alt+j)
The journal tells you things like when the task was created, how it was passed around, who closed it and notes added during the lifetime of the task.
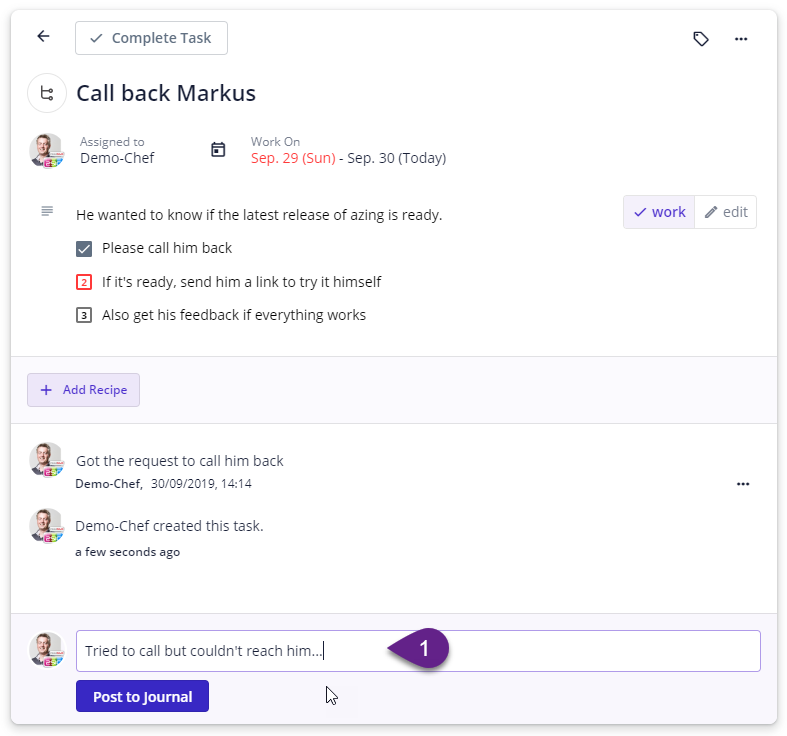
With Alt+j your cursor jumps into the add journal field.
Personal Tags on a Task (Alt+t)
You can add personal tags to your task to better organize and group your work. To add tags, you can press the Tag icon or hit Alt+t.
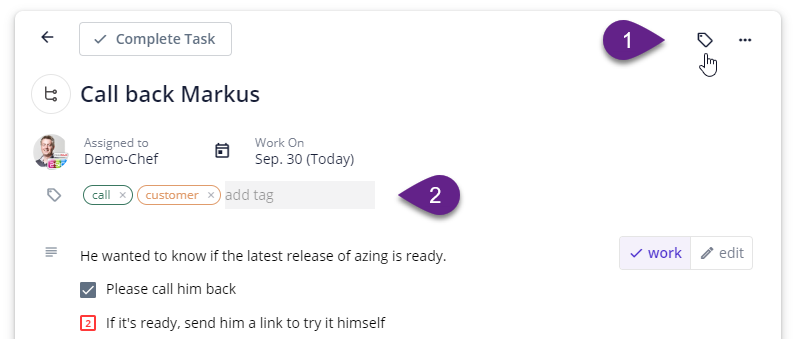
As of now, the tags you set on a task are your personal tags, other team members won't see them. In future, we'll introduce a team-tagging system, where an admin can manage what tags should be used in your team.
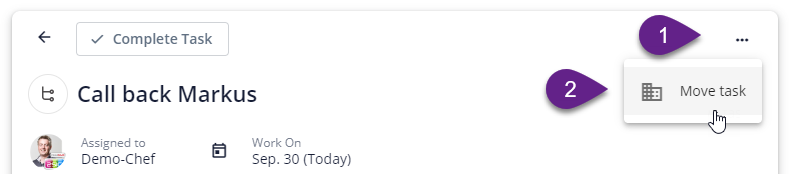
Moving Tasks to Another Team
In rare cases the task may be in the wrong team - like when you press NEW TASK while you are on your personal tasks but it should be a company-task. In this case, you can always move a task to another team:
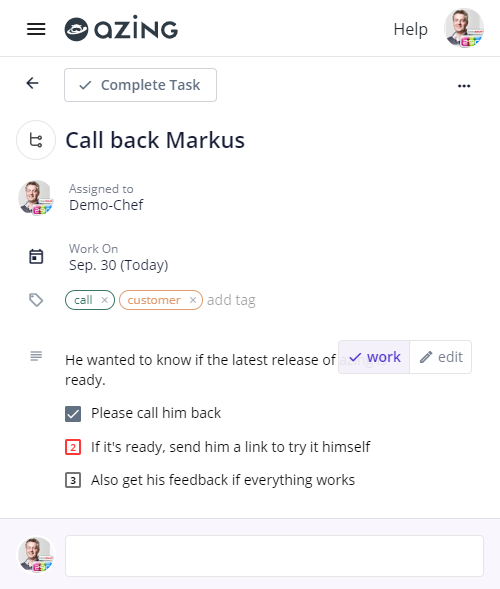
Mobile Use
The task management has been completely tested to work on modern mobile devices. So give it a try, you'll enjoy it!
Important things to know
User Interface Language
As of now, the UI language is determined by your browser settings. The task-management currently has the complete user interface in English and German.
User Profile Pictures
Users can set their profile picture - so the picture you see comes from there. If they did not set a picture yet, you'll see a generic image instead.
User Names
The user name you'll see on faces and in the delegate dialog are the Display Name properties of users. If new users don't set that name yet, you'll see the e-mail address instead.
Get Started Now
We would love to see you start using the task-management and tell us what we can improve. Create your azing account now and leave us feedback by e-mail or through the support form.
Love from Switzerland,
Daniel